Cloning Radial Countdown Timer
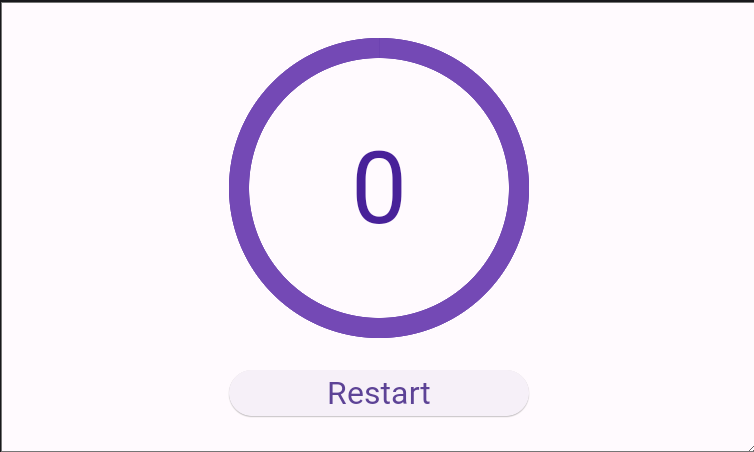
2번째로 구현해볼 것은 위와 같은 디자인의 카운트 다운 타이머입니다.
Restart버튼을 누르면 10초에서 0초까지 카운트다운이 시작되며 숫자를 감싸고 있는 원의 배경색이 시간에 맞춰 반시계 방향으로 변하는 애니메이션을 추가해주면 됩니다.
구현에 앞서 다음의 Widget들에 대해 간단히 알아보도록 하겠습니다.
- StatefulWidget
- CustomPaint and CustomPainter
- Animation
- AnimationController
- Tween
- AnimatedWidget
- Timer
- Ticker
Prerequisites
StatefulWidget(abstract)
A widget that has mutable state. State is information that
(1) can be read synchronously when the widget is built and
(2) might change during the lifetime of the widget.
It is the responsibility of the widget implementer to ensure the State is Promptly notified when such state changes, using State.setState.
…
Stateful widgets are useful when the part of the user interface you are describing can change dynamically, e.g. due to having an internal clock-driven state, or depending on some system state.
- StatelessWidget과는 달리 값이 변할 수 있는 state를 저장
- state라 함은 (1) Widget 생성과 동시에 읽을 수 있는 값
- 혹은 (2)Widget의 생애주기 상에서 변할 수 있는 값
- 이 state가 언제 변할지는 개발자가 setState를 이용해 명시적으로 알려줘야함
How to use StatefulWidget Example
class Counter extends StatefulWidget {
const Counter({super.key});
// Must override createState method.
State<Counter> createState() => _CounterState();
}
class _CounterState extends State<Counter> {
// state to change over lifecycle of the widget.
// in this case we are changing the count using Timer.periodic
int _count = 0;
Timer? _timer;
void initState() {
super.initState();
_timer = Timer.periodic(duration: const Duration(seconds: 1), (timer) {
// Explicitly calling State.setState method to let the widget know
// the state has changed and mark the widget dirty.
setState(() {
_count += 1;
});
});
}
void dispose() {
_timer?.cancle();
super.dispose();
}
//Must override build method.
Widget build(BuildContext context) {
return SizedBox(
width: 300,
height: 300,
child: Center(
child: Text('$_count'),
),
);
}
}CustomPaint
A widget that provides a canvas on which to draw during the paint phase.
When asked to paint, CustomPaint first asks its painter to paint on the current canvas,then, it paints its child, and then, after painting its child, it asks its foregroundPainter to paint.
The coordinate system of the canvas matches the coordinate system of the CustomPaint object. The painters are expected to paint within a rectangle starting at the origin and encompassing a region of the given size.(If the painters paint outside those bounds, there might be insufficient memory allocated to rasterize the painting commands and resulting behavior is undefined.)
To enforce painting within those bounds, consider wrapping this CustomPaint with a ClipRect widget.
Painters are implemented by subclassing CustomPainter.
- Painter를 이용해 원하는 모형을 그릴 도화지(Canvas)를 제공하는 클래스라고 이해할 수 있음.
- Rendering(Layout -> Paint -> Composition)시 CustomPaint는 다음의 순서로 도형을 그려냄
- painter
- child
- foreground painter
How to use CustomPaint
CustomPaint(
    painter: Sky(),
    child: const Center(
        child: Text(
            'Once upon a time...',
            style: TextStyle(
                fontSize: 40.0,
                fontWeight: FontWeight.w900,
                color: Colors.white,
            ),
        ),
    ),
)
CustomPainter(abstract)
The interface used by CustomPaint(in the widgets library) and RenderCustomPaint(in the rendering library).
To implement a custom painter, either subclass or implement this interface to define your custom paint delegate. CustomPainter subclasses must implement the paint and shouldRepaint methods, and may optionally also implement the hitTest and shouldRebuildSemantics methods, and the semanticsBuilder getter.
The paint method is called whenever the custom object needs to be repainted.
The shouldRepaint method is called when a new instance of the class is provided, to check if the new instance actually represents different information.
- CustomPaint 혹은 RenderCustomPaint 에서 사용되는 인터페이스(상세구현 필요)
- paint 메서드와 shouldRepaint 메서드 필수로 구현.
- hitTest , shouldRebuildSemantics, semanticsBuilder 메서드 구현은 선택.
How to use CustomPainter
class Sky extends CustomPainter {
// paint method 구현 필수
void paint(Canvas canvs, Size size) { // 그림 그릴 도화지와 도화지의 사이즈
final Rect rect = Offset.zero & size;
const RadialGradient gradient = RadialGradient(
center: Alignment(0.7, -0.6),
radius: 0.2,
colors: <Color>[Color(0xFFFFFF00), Color(0xFF0099FF)],
stops: <double>[0.4, 1.0],
);
canvas.drawRect(
rect,
Paint()..shader = gradient.createShader(rect), // Paint는 일종의 연필입니다.
);
}
}
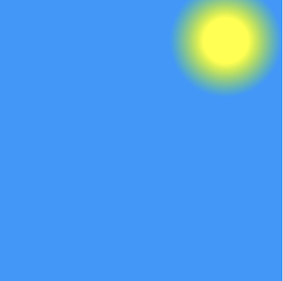
Sky는 다음과 같이 생긴 모형에 대해 묘사하는 클래스입니다.
Animation(abstract)
An animation with a value of type T.
An animation consists of a value (of type T) together with a status. The status indicates whether the animation is conceptually running from beginning to end or from the end back to the beginning, although the actual value of the animation might not change monotonically (e.g. if the animation uses a curve that bounces).
Animations also let other object listen for changes to either their value or their status. These callbacks are called during the “animation” phase of the pipeline, just prior to rebuilding widgets.
To create a new animation that you can run forward and backward, consider using AnimationController.
In Flutter, an Animation object knows nothing about what is onscreen. An Animation is an abstract class that understands its current value and its state(completed or dismissed). One of the more commonly used animation types double.
An Animation object sequentially generates interpolated numbers between two values over a cenrtain duration. The output of an Animation object might be linear, a curve, a step function, or any other mapping you can devise. Depending on how the Animation object is controlled, it could run in revesrse, or even switch directions in the middle.
Animations can also interpolate types other than double, such as Color or Size.
An Animation object knows nothing about rendering or build() functions.
- Animation은 T 타입의 값과 상태(completed or dismissed와 같은)값을 갖는 클래스
- T 타입으로는 double이 일반적으로 많이 사용되고 Color 혹은 Size 같은 것들도 사용 가능함.
- animation이 실행되는 시간 간격(duration)을 정할 수 있음.
- animation은 실제 화면에 그려지는 세부사항에 대해서는 상관하지 않음.
AnimationController
A controller for an animation.
This class lets you perform tasks such as:
- Play an animation forward or in reverse, or stop an animation.
- Set the animation to a specific value.
- Define the upperBound and lowerBound values of an animation.
- Create a fling animation effect using a physics simulation.
By default, an AnimationController linearly produces values that range from 0.0 to 1.0, during a given duration. The animation controller generates a new value whenever the device running your app is ready to display a new frame (typically, this rate is around 60 values per second).
- AnimationController는 Animation 추상클래스를 상속받는 클래스.
- 해당 animation을 컨트롤하기 위한 API들의 집합체
- animation을 재생(forward), 역재생(reverse), 멈추기(stop), 리셋(reset) 등의 메서드 제공
- animation value의 상한(upperBound), 하한(lowerBound)을 설정
class AnimationController extends Animation<double> with AnimationEagerListenerMixin, AnimationLocalListenersMixin, AnimationLocalStatusListenersMixin {
AnimationController({
double? value,
this.duration,
this.reverseDuration,
this.debugLabel,
this.lowerBound = 0.0,
this.upperBound = 1.0,
this.animationBehavior = AnimationBehavior.normal,
required TickerProvider vsync, // WTF is this?
}): assert(upperBound >= lowerBound),
_direction = _AnimationDirection.forward {
if (kFlutterMemoryAllocationsEnabled) {
_maybeDispatchObjectCreation();
}
}
_ticker = vsync.createTicker(_tick);
_internalSetValue(value ?? lowerBound);
...
void reset() {...}
void stop({bool canceled = true}) {...}
TickerFuture forward({double? from}) {...}
TickerFuture reverse({double? from}) {...}
TickerFuture toggle({double? from}) {...}
TickerFuture repeat(double? min, double? max, bool reverse = false, Duration? period, int? count) {...}
...
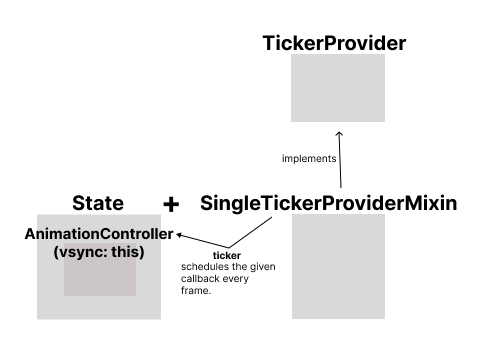
}An AnimationController needs a TickerProvider, which is configured using the vsync argument on the constructor.
The TickerProvider interface describes a factory for Ticker objects. A Ticker is an object that knows how to register itself with the SchedulerBinding and fires a callback every frame. The AnimationController class uses a Ticker to step through the animation that it controls.
If an AnimationController is being created from a State, then the State can use the TickerProviderStateMixin and SingleTickerProviderStateMixin classes to implement the TickerProvider interface. The TickerProviderStateMixin class always works for this purpose; the SingleTickerProviderStateMixin is slightly more efficient in the case of the class only ever needing one Ticker.
- AnimationController는 반드시 Ticker를 필요로함
- Ticker는 SchedulerBinding을 통해 매 프레임마다 주어진 callback을 실행시킬 수 있는 object
- State안에서 AnimationController를 초기화하여 사용하는 경우 TickerProviderStateMixin을 함께 사용하여 Ticker를 넣어주도록 하자.
TickerProvider(abstract)
An interface implemented by classes that can vend Ticker objects.
Tickers can be used by any object that wants to be notified whenever a frame triggers, but are most commonly used indirectly via an AnimationController.
TickerProvider const constructor enables subclasses to provide const constructors so that they can be used in const expressions.
Ticker
Calls its callback once per animation frame.
When created, a ticker is initially disabled. Call start to enable the ticker.
A Ticker can be silenced by setting muted to true. While silenced, time still elapses, and start and stop can still be called, but no callbacks are called.
By convention, the start and stop methods are used by the ticker’s consumer, and the muted property is controlled by the TickerProvider that create the ticker.
Tickers are driven by the SchedulerBinding. See SchedulerBinding.schedulerFrameCallback.
SchedulerBinding(mixin)
Scheduler for running the following:
- Transient callbacks, triggered by the system’s dart:ui.PlatformDispatcher.onBeginFrame callback, for synchronizing the application’s behavior to the system’s display. For example, Tickers and AnimationControllers trigger from these.
- Persistent callbacks, triggerd by the system’s dart:ui.PlatfromDispatcher.onDrawFrame callback, for updating the system’s display after transient callbacks have executed. For example, the rendering layer uses this to drive its rendering pipeline.
- Post-frame callbacks, which are run after persistent callbacks, just before returning from the dart:ui.PlatformDispatcher.onDrawFrame callbacks.
- Non-rendering tasks, to be run between frames. These are given a priority and are executed in priority order according to a schedulingStrategy.
SchedulerBinding.scheduleFrameCallback(method)
int scheduleFrameCallback(
    FrameCallback callback, {
        bool rescheduling = false,
    }
)
Schedules the given transient frame callback.
Adds the given callback to the list of frame callbacks and ensures that a frame is scheduled.
If this is called during the frame’s animation phase (when transient frame callbacks are still being invoked), a new frame will be scheduled, and callback will be called in the newly scheduled frame, not int the current frame.
Tween
A linear interpolation between a beginning and ending value.
Tween is useful if you want to interpolate across a range.
To use a Tween object with an animation, call the Tween object’s animate method and pass it the Animation object that you want to modify.
A Tween is a stateless object that takes only begin and end. The sol job of a Tween is to define a mapping from an input range to an output range. The input range is commonly 0.0 to 1.0, but that’s not a requirement.
- Tween은 between의 준말이라고 생각하면 됨. begin to end.
- 0.0 ~ 1.0 이 기본값으로 쓰이는데 이 값을 바꾸고 싶을 때 혹은 double이 아닌 다른 타입을 사용하고 싶을 때 유용
- animate 메서드를 이용해 animation controller를 연결.
Example Code
class CounterApp extends StatefulWidget {
const CounterApp({super.key});
State<CounterApp> createState() => _CounterAppState();
}
class _CounterAppState extends State<CounterApp> with SingleTickerProviderMixin{
int count;
Timer _timer;
late Animation<double> animation;
late AnimationController controller;
void handleRestart() {
_timer?.cancle(); // cancel if the timer already exists.
controller.reset(); // reset the animation.
setState(() {
count = 10;
})
_timer = Timer.periodic(const Duration(seconds: 1), () {
setState((){
count > 0 ? count -= 1 : timer.cancel();
})
});
controller.forward(); // start the animation.
}
Widget build(BuildContext context) {
return Center(
child: Counter()
)
}
void initState() {
super.initState();
// initialize the animation controller and animation to be controlled
controller = AnimationController(vsync: this, duration: Duration(seconds: 1));
animation = Tween<double>(begin:0, end:-pi*2).animate(controller);
}
void dispose() {
// timer and controller are expensive resources so it should be removed when disposed.
_timer.dispose();
controller.dispose();
super.dispose();
}
}
AnimatedWidget
A widget that rebuilds when the given Listenable changes value.
AnimatedWidget is most commonly used with Animation objects, which are Listenable, but it can be used with any Listenable, including ChangeNotifier and ValueNotifier.
AnimatedWidget is most useful for widgets that are otherwise stateless. To use AnimatedWidget, subclass it and implement the build function.
개선1. Using prebuilt animation widget (CircularProgressIndicator)
정확히 이런 종류의 애니메이션을 위해 미리 만들어진 위젯이 있습니다.
찾을 수만 있다면 이처럼 미리 만들어진 위젯을 사용하는게 가장 좋다고 생각합니다.
Flutter의 Widget of the week 시리즈에도 소개된 위젯이니 한번 봐보면 좋을 것 같습니다.
Flutter Widget of the Week - CircularProgressIndicator & LinearProgressIndicator
개선2. Refactoring with AnimatedBuilder
AnimatedBuilder를 각 클래스가 담당하는 부분이 좀 더 명확하게 보이도록 분리시킬 수 있습니다.
- 실제로 보여주고자 하는 도형에 대한 클래스 (이 경우 CustomCircle과 CustomPaint)
- 해당 도형에 적용될 애니메이션 (
animation = Tween<double>(begin: 0, end: -2 * pi).animate(controller);) - 해당 애니메이션의 렌더링에 대한 클래스 (RadialTransition)
import 'package:flutter/material.dart';
import 'dart:math';
import 'dart:async';
// refactoring with AnimatedBuilder
// The main advantage of using AnimatedBuilder is separating the responsibilities into different classes.
// 1. Render the Actual object
// 2. Define the animation object
// 3. Render the transition
class CounterRefactor extends StatefulWidget {
const CounterRefactor({super.key});
State<CounterRefactor> createState() => _CounterState();
}
class _CounterState extends State<CounterRefactor>
with SingleTickerProviderStateMixin {
late Animation<double> animation;
late AnimationController controller;
late Stopwatch _stopwatch;
Timer? _timer;
final int maxTimeOut = 10;
int elapsedTimeInSeconds = 0;
int _elapsed = 0;
void restart() {
controller.reset();
_stopwatch.reset();
setState(() => elapsedTimeInSeconds = 0);
_stopwatch.start();
// Periodic timer의 duration이 1초마다 바뀌는게 아닌 가능한 빨리(Duration.zero) 바뀌도록 설정해주고 있습니다.
// AnimatedWidget을 사용할 때와는 달리 RadialTransition의 child로 CustomPaint를 넣어주고
// 있기 때문에 기존처럼 1초마다 바뀌도록 하면 애니메이션이 뚝뚝 끊기듯이 재생됩니다.
// Stopwatch를 새롭게 추가해 elapsed time을 구해서 사용하도록 바꿔주었습니다.
_timer = Timer.periodic(Duration.zero, (timer) {
setState(() {
_elapsed = _stopwatch.elapsedMilliseconds;
if (_elapsed ~/ 1000 != elapsedTimeInSeconds) {
elapsedTimeInSeconds = _elapsed ~/ 1000;
}
if (maxTimeOut - elapsedTimeInSeconds < 1) {
timer.cancel();
_stopwatch.stop();
}
});
});
controller.forward();
}
void initState() {
super.initState();
_stopwatch = Stopwatch();
controller =
AnimationController(vsync: this, duration: const Duration(seconds: 10));
animation = Tween<double>(begin: 0, end: -2 * pi).animate(controller);
}
Widget build(BuildContext context) {
return Center(
child: SizedBox(
width: 400,
height: 400,
child: Column(
children: [
Stack(
alignment: Alignment.center,
children: [
Container(
width: 300,
height: 300,
decoration: BoxDecoration(
shape: BoxShape.circle,
color: Theme.of(context).colorScheme.onPrimary,
border: Border.all(width: 30, color: Colors.deepPurple),
),
),
RadialTransition(
animation: animation,
child: CustomPaint(
painter: CustomCircle(
startAngle: -pi / 2, sweepAngle: animation.value),
size: const Size(300, 300),
)),
Container(
decoration: BoxDecoration(
color: Theme.of(context).colorScheme.onPrimary,
shape: BoxShape.circle),
width: 265,
height: 265,
),
Text(
'${maxTimeOut - elapsedTimeInSeconds}',
style: const TextStyle(
fontWeight: FontWeight.bold,
fontSize: 80,
color: Colors.deepPurple,
),
)
],
),
ElevatedButton(onPressed: restart, child: const Text("Restart"))
],
),
),
);
}
void dispose() {
super.dispose();
controller.dispose();
}
}
class RadialTransition extends StatelessWidget {
final Animation animation;
final Widget child;
const RadialTransition(
{super.key, required this.animation, required this.child});
Widget build(BuildContext context) {
return AnimatedBuilder(
animation: animation,
builder: (context, child) {
return Container(
decoration: const BoxDecoration(
color: Colors.deepPurple,
shape: BoxShape.circle,
),
width: 300,
height: 300,
child: child,
);
},
child: child,
);
}
}
class CustomCircle extends CustomPainter {
double startAngle;
double sweepAngle;
CustomCircle({required this.startAngle, required this.sweepAngle});
void paint(Canvas canvas, Size size) {
Paint paint = Paint();
paint.color = Colors.deepPurple.shade300;
paint.strokeWidth = 2;
Offset canvasCenter = Offset(size.width / 2, size.height / 2);
canvas.drawArc(
Rect.fromCenter(
center: canvasCenter, width: size.width, height: size.height),
startAngle,
sweepAngle,
true,
paint);
}
bool shouldRepaint(oldDelegate) {
return true;
}
}
개선3. Using Ticker instead of Timer (Counter)
Flutter의 대부분의 Animation 관련 위젯들은 내부적으로 Ticker를 사용하고 있습니다.
예를 들어 지금까지 사용하던 AnimationController도 사실은 Ticker를 이용해 스케줄링을 하고 있습니다.
class AnimationController extends Animation<double>
with AnimationEagerListenerMixin,
AnimationLocalListenerMixin,
AnimationLocalStatusListenerMixin{
    ...

    Ticker? _ticker;

    ...

    void resync(TickerProvider vsync) {
        final Ticker oldTicker = _ticker;
        _ticker = vsync.createTicker(_tick);
        _ticker!.absorbTicker(oldTicker);
    }

    ...
}
Ticker를 사용하면 animation을 사용할 때와는 다른 custom painter가 필요합니다.
또한 Timer와는 다르게 elapsed time을 알 수 있어 stopwatch를 별도로 만들지 않아도 됩니다.
import 'package:flutter/material.dart';
import 'dart:math';
import 'package:flutter/scheduler.dart';
class CounterRefactor2 extends StatefulWidget {
const CounterRefactor2({super.key});
State<CounterRefactor2> createState() => _CounterRefactor2State();
}
class _CounterRefactor2State extends State<CounterRefactor2>
with SingleTickerProviderStateMixin {
late Ticker _ticker;
final int maxTimeOut = 10;
int elapsedTimeInSeconds = 0;
Duration _elapsed = Duration.zero;
double progress = 0.0;
int get remainingTime => max(0, maxTimeOut - _elapsed.inSeconds);
void initState() {
super.initState();
_ticker = createTicker((elapsed) {
setState(() {
_elapsed = elapsed;
progress = _elapsed.inMilliseconds / (1000 * maxTimeOut);
if (_elapsed.inSeconds > 10) {
_ticker.stop();
}
});
});
}
void dispose() {
super.dispose();
_ticker.dispose();
}
void restart() {
_ticker.stop();
_ticker.start();
}
Widget build(BuildContext context) {
return Center(
child: Column(
mainAxisAlignment: MainAxisAlignment.center,
children: [
Stack(
alignment: Alignment.center,
children: [
CustomPaint(
painter: CustomCircle(progress: progress),
size: const Size(400, 400),
),
Text(
'$remainingTime',
style: const TextStyle(
fontWeight: FontWeight.bold,
fontSize: 80,
color: Colors.deepPurple,
),
),
],
),
ElevatedButton(
onPressed: restart,
child: const Text("Restart"),
),
],
),
);
}
}
class CustomCircle extends CustomPainter {
final double progress;
CustomCircle({required this.progress});
void paint(Canvas canvas, Size size) {
Offset canvasCenter = Offset(size.width / 2, size.height / 2);
final Paint background = Paint();
background.strokeWidth = 25;
background.color = Colors.deepPurple.shade300;
background.style = PaintingStyle.stroke;
canvas.drawCircle(canvasCenter, size.width / 2, background);
Paint foreground = Paint();
foreground.color = Colors.deepPurple.shade700;
foreground.strokeWidth = 25;
foreground.style = PaintingStyle.stroke;
canvas.drawArc(
Rect.fromCenter(
center: canvasCenter, width: size.width, height: size.height),
-pi / 2,
-2 * pi * progress,
false,
foreground);
}
bool shouldRepaint(covariant CustomCircle oldDelegate) {
return oldDelegate.progress != progress;
}
}